Easy to Draw Flowers Step by Step
Flowers undoubtedly bring a great amount of color and beauty to the world. It's hard to look at a beautiful, fragrant flower and not have a smile on your face!
Whether used to brighten up a room or as a gift to a lover, it's always a welcome sight to see a pretty flower.
You may love flowers, but if you've ever wondered how to draw a flower you're in the right place! By the end of this guide, you will be drawing flowers with ease.
This fun and simple step-by-step guide was created especially to help you learn how to draw a flower in just 9 easy steps!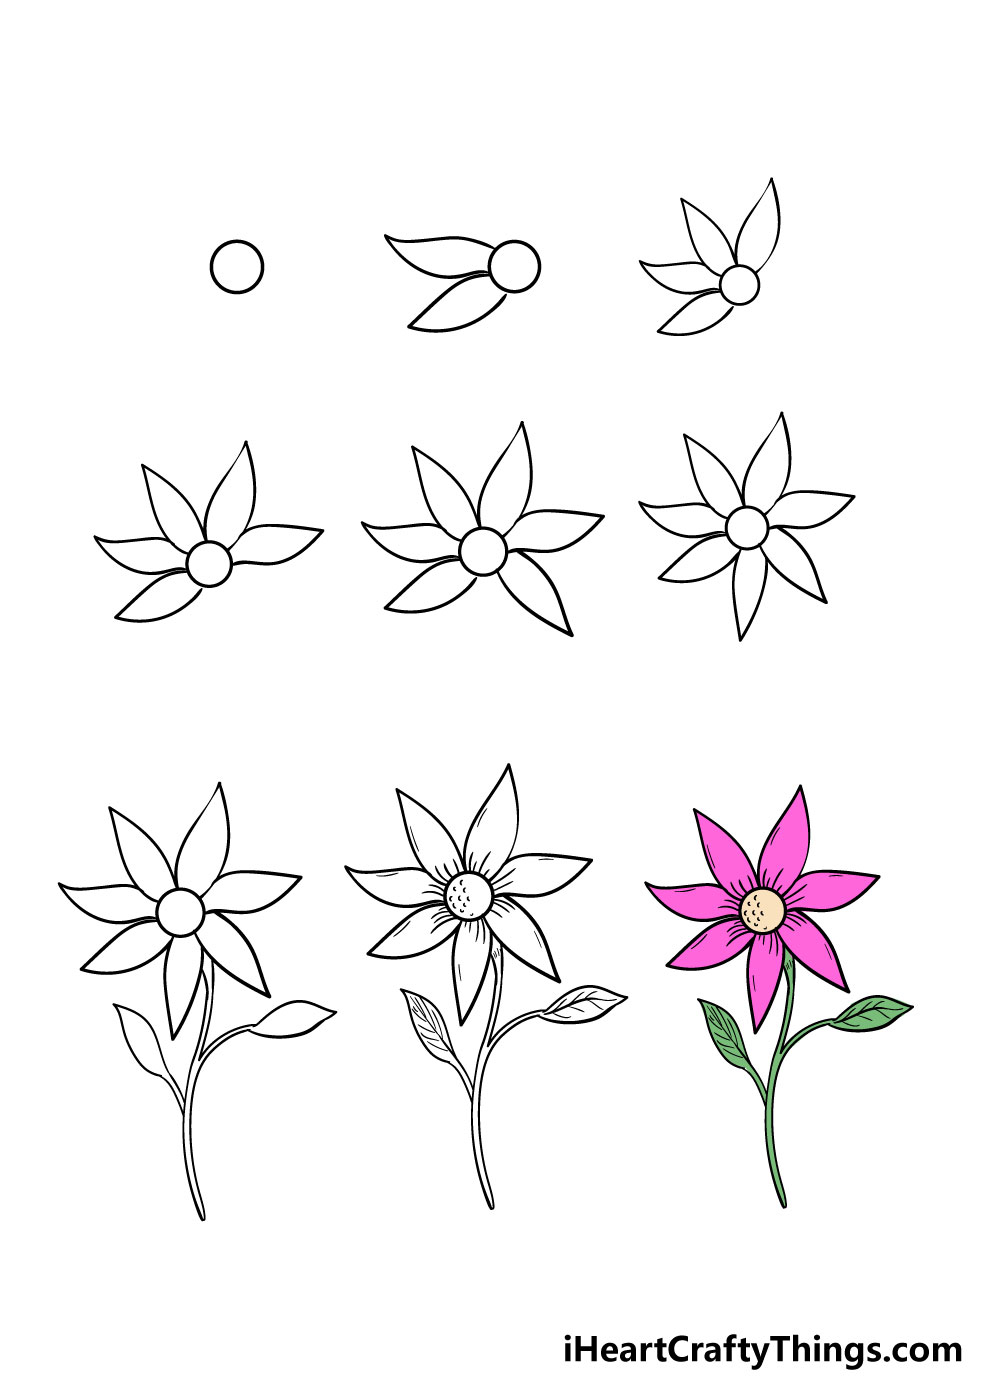
What's in this Blog Post
- How to Draw a Flower – Let's get Started!
- Step 1
- Step 2 – Draw in the first two petals
- Step 3 – Next, draw in two more petals
- Step 4 – Now draw in the next petal
- Step 5 – Next you will be adding another petal
- Step 6 – Add in the final petal
- Step 7 – Now draw in the stem and leaves
- Step 8 – Add the final details
- Step 9 – Finish it off with some color
- 4 More Ways To Make Your Flower Drawing Unique
- Your Flower Drawing is Complete!
How to Draw a Flower – Let's get Started!
Step 1
For your first step in this guide on how to draw a flower, the first thing you need to do is to draw in a small circle.
If you can freehand a near-perfect circle that would work perfectly, but you can also use a drawing compass for a perfect circle.
You could also use something small and round like the cap of a thick pen to draw around if you don't have a drawing compass.
For this step, you can draw this circle with a pen or a dark pencil, as it will be in the final picture.
Step 2 – Draw in the first two petals
Now that you have the center of your flower drawing, it's time to draw in the first petals! To do this, draw in two curvy lines that are thick at the bottom and meet at a thinner point at the end.
For this step, try to draw in two petals as shown in the reference image.
This can take a bit of practice, so maybe use a lighter pencil to draw in these petals and then go over them in pen or darker pencil once you're happy with them.
Step 3 – Next, draw in two more petals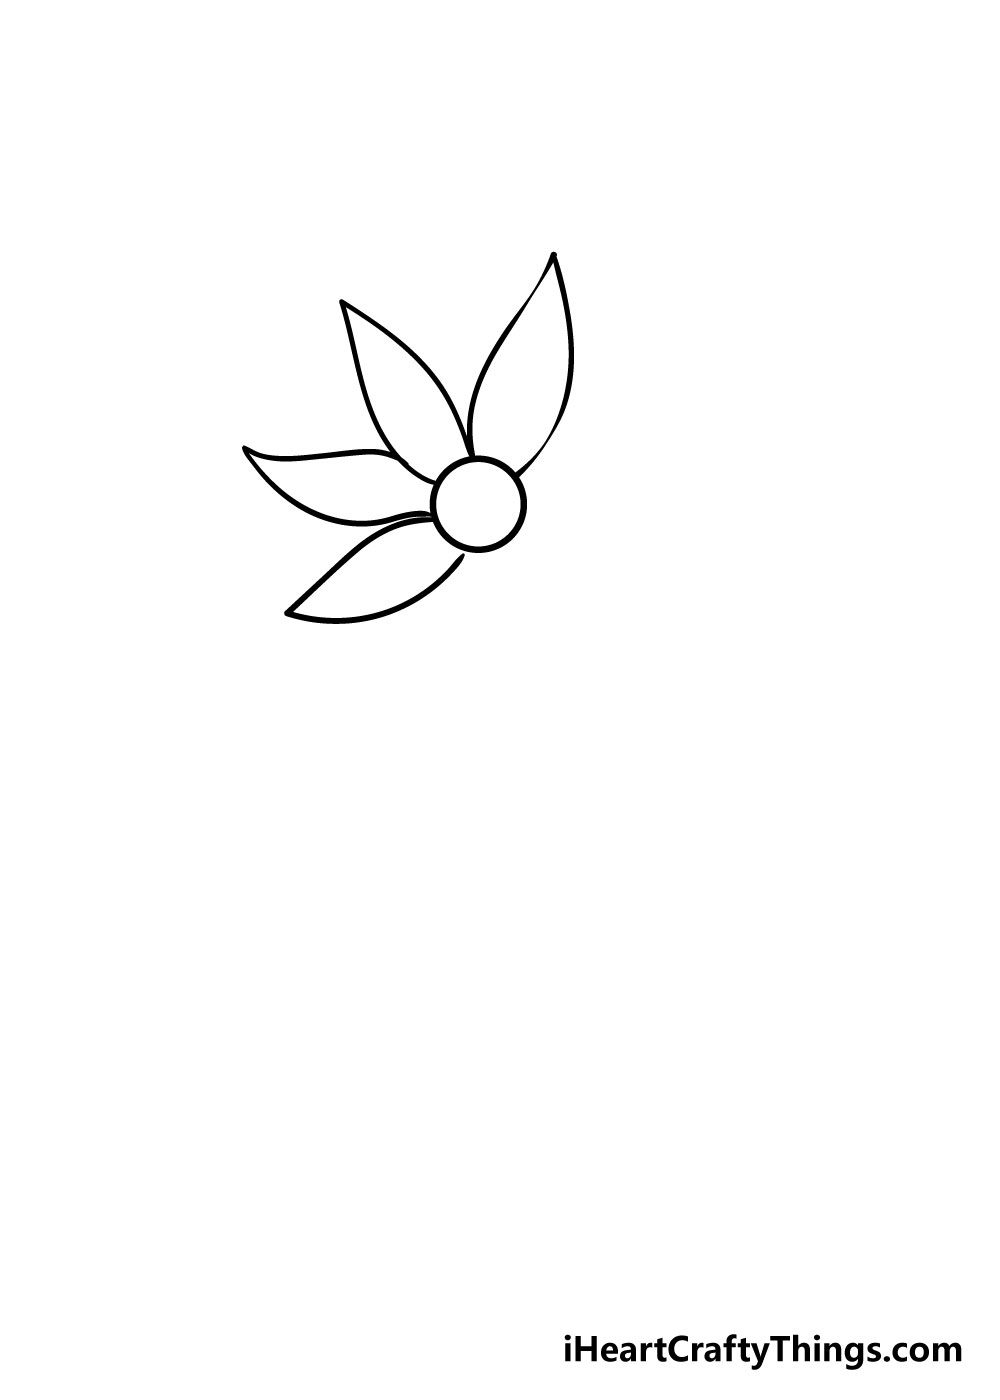
You've drawn in your first two petals, so now that you have the hang of that it's time to add in the next two.
For this step, simply draw in two more petals exactly as you did before to the right of the ones you have already.
Step 4 – Now draw in the next petal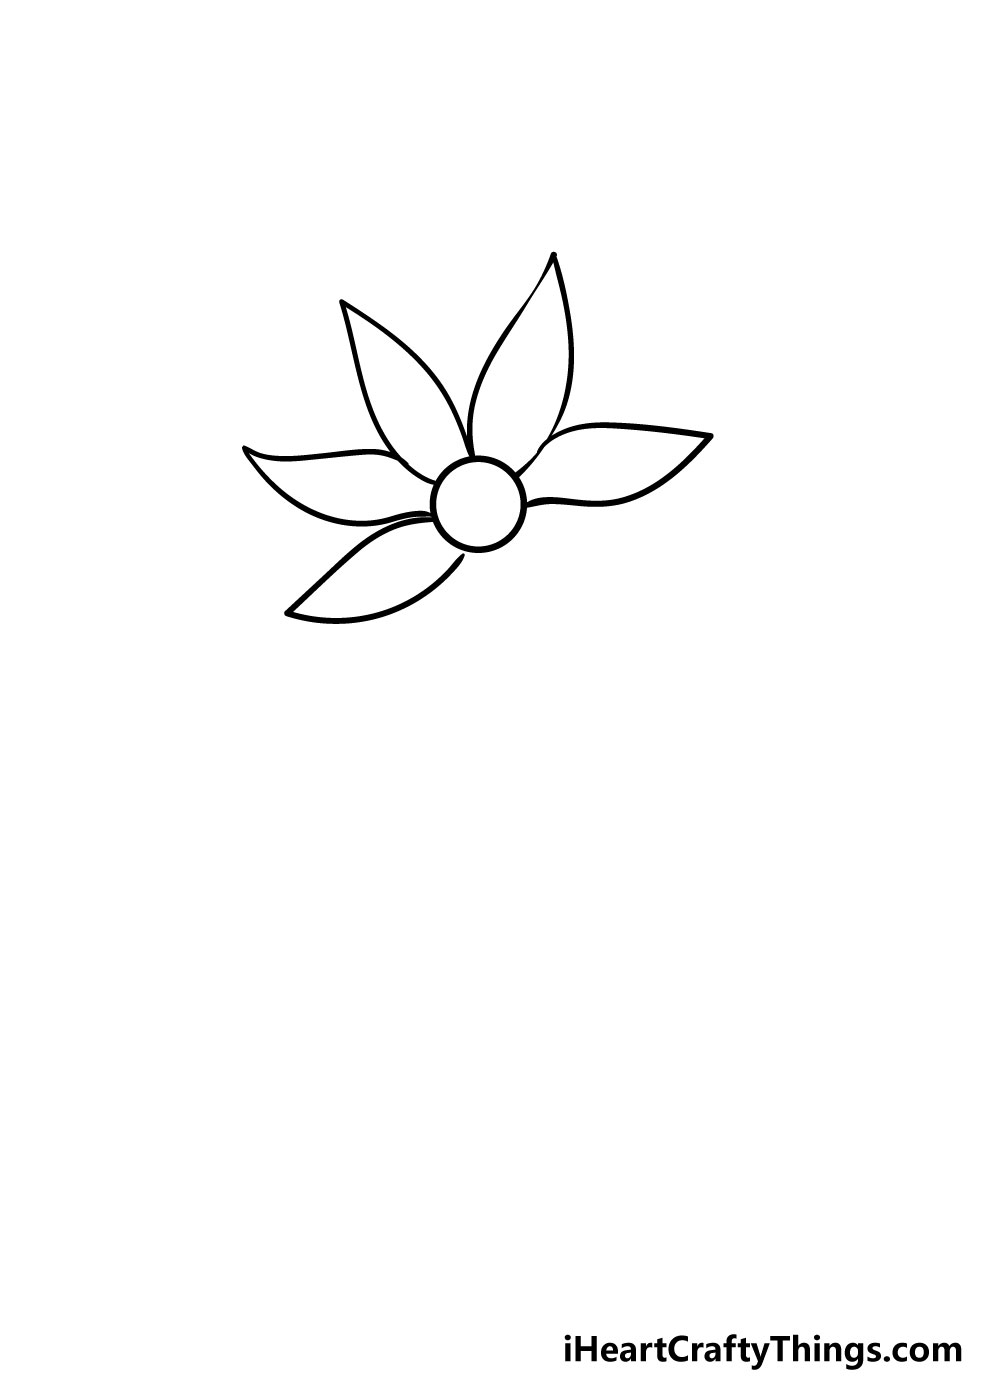
For step 4 of learning how to draw a flower, you will be adding in another petal at the top of the flower.
This petal will be a bit thinner and of a slightly different shape to the others though, so make sure to refer to the reference image if you're having a hard time with it.
Step 5 – Next you will be adding another petal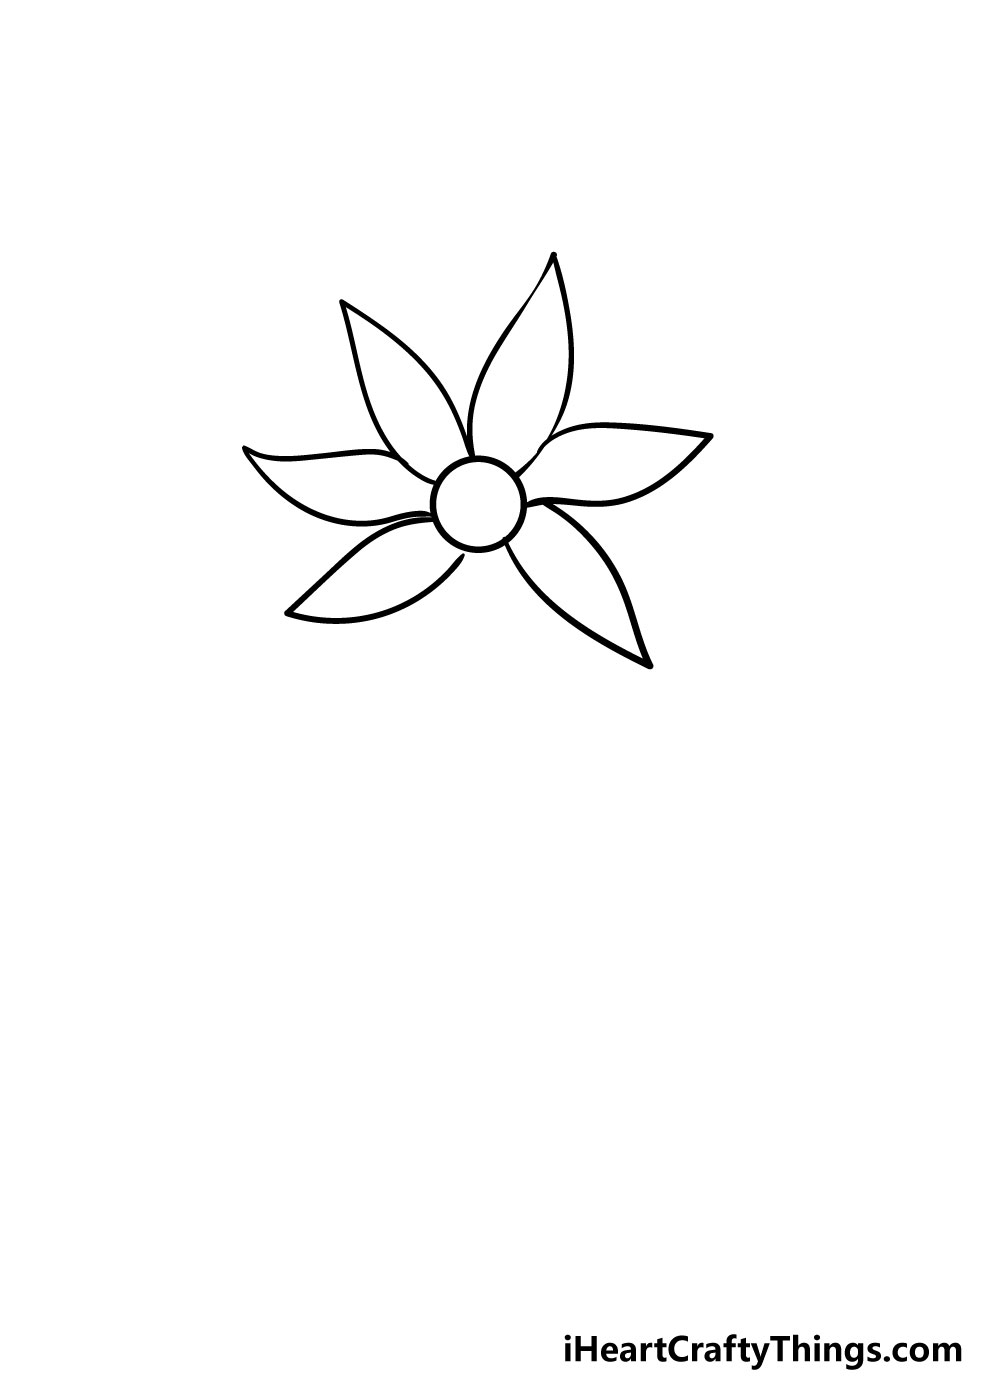
We will be adding in one of the final petals onto your flower drawing for step 5, so simply draw in one more petal as shown in the reference picture.
As you can see, your flower drawing is really starting to take shape!
Step 6 – Add in the final petal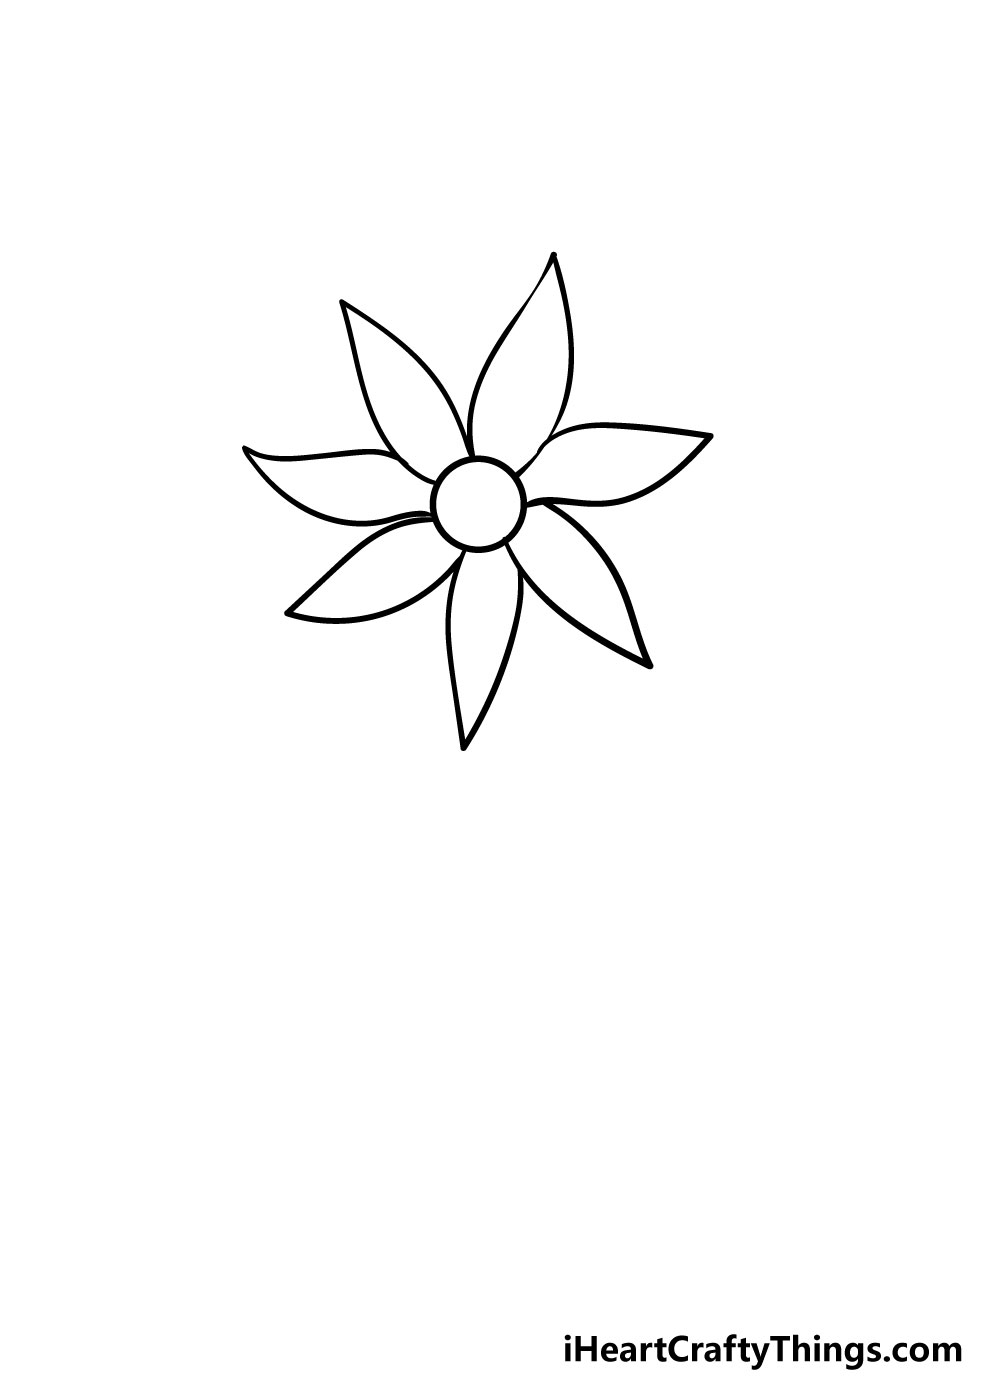
You've almost finished the main part of your flower drawing, so for this step you just need to add in the final petal.
This one should be a little thinner and sharper as you can see in the reference image. If you've followed the guide then the petals should generally be of a similar size with both length and width.
Step 7 – Now draw in the stem and leaves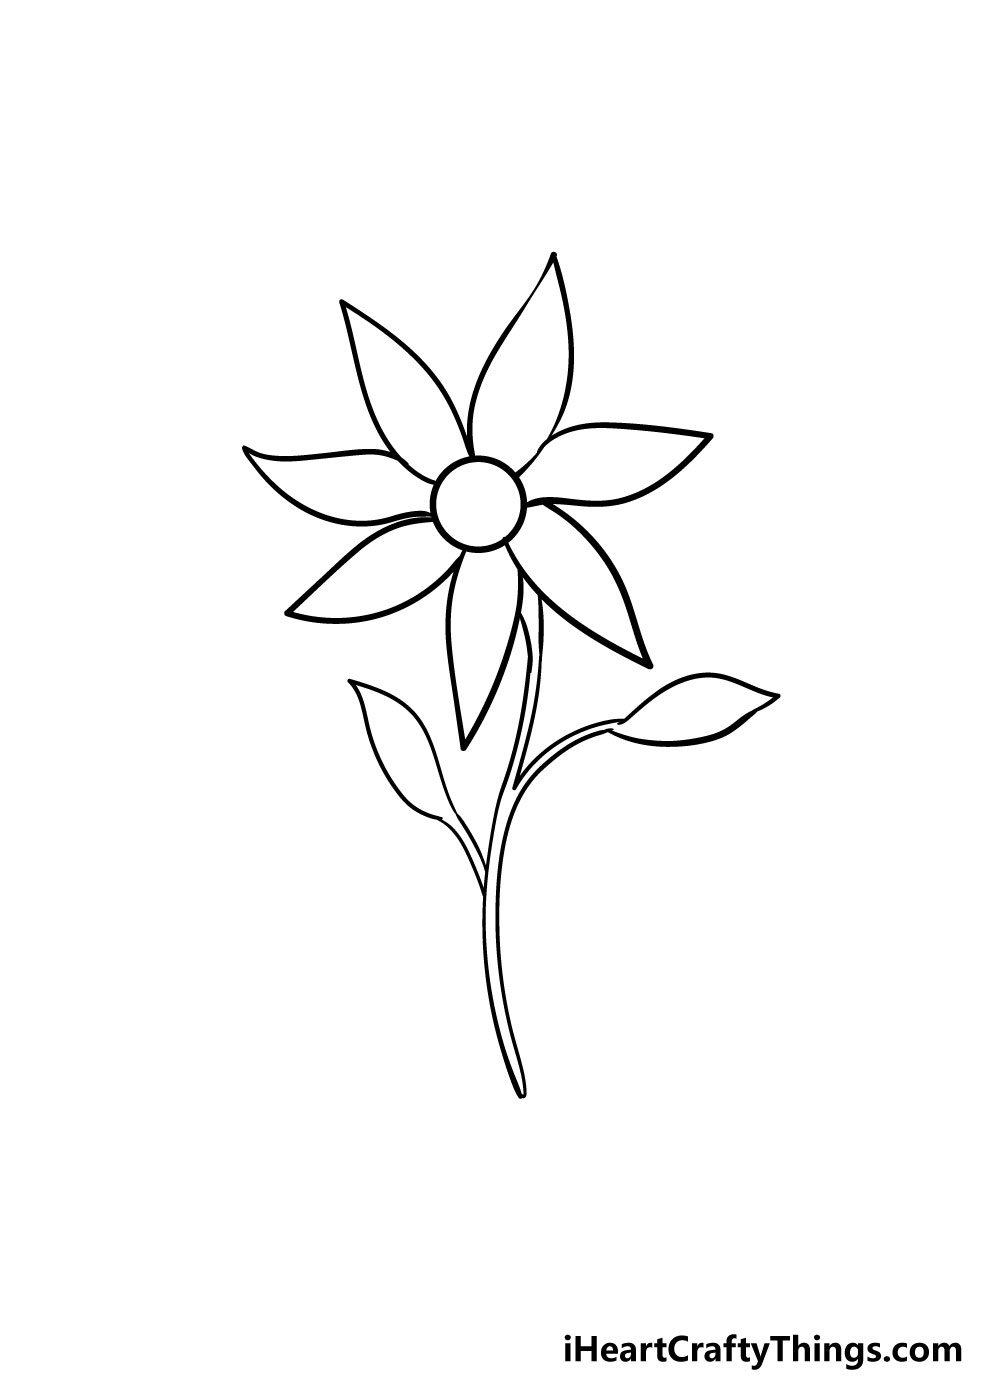
For this next step in learning how to draw a flower, there are some tricky aspects so the reference picture will be very handy!
I would also recommend using a lighter pencil for this step before going over it in pen. To start with, draw two curvy lines extending from between the two lowest petals as you can see in the image.
They should be very close to one another and join at the end.
Once you've done that, draw in one of the leaves by drawing two curved lines coming off the stem and then meeting in a leaf shape.
The reference picture should prove very useful for this! Once you have that drawn in, simply draw in another leaf on the other side.
Step 8 – Add the final details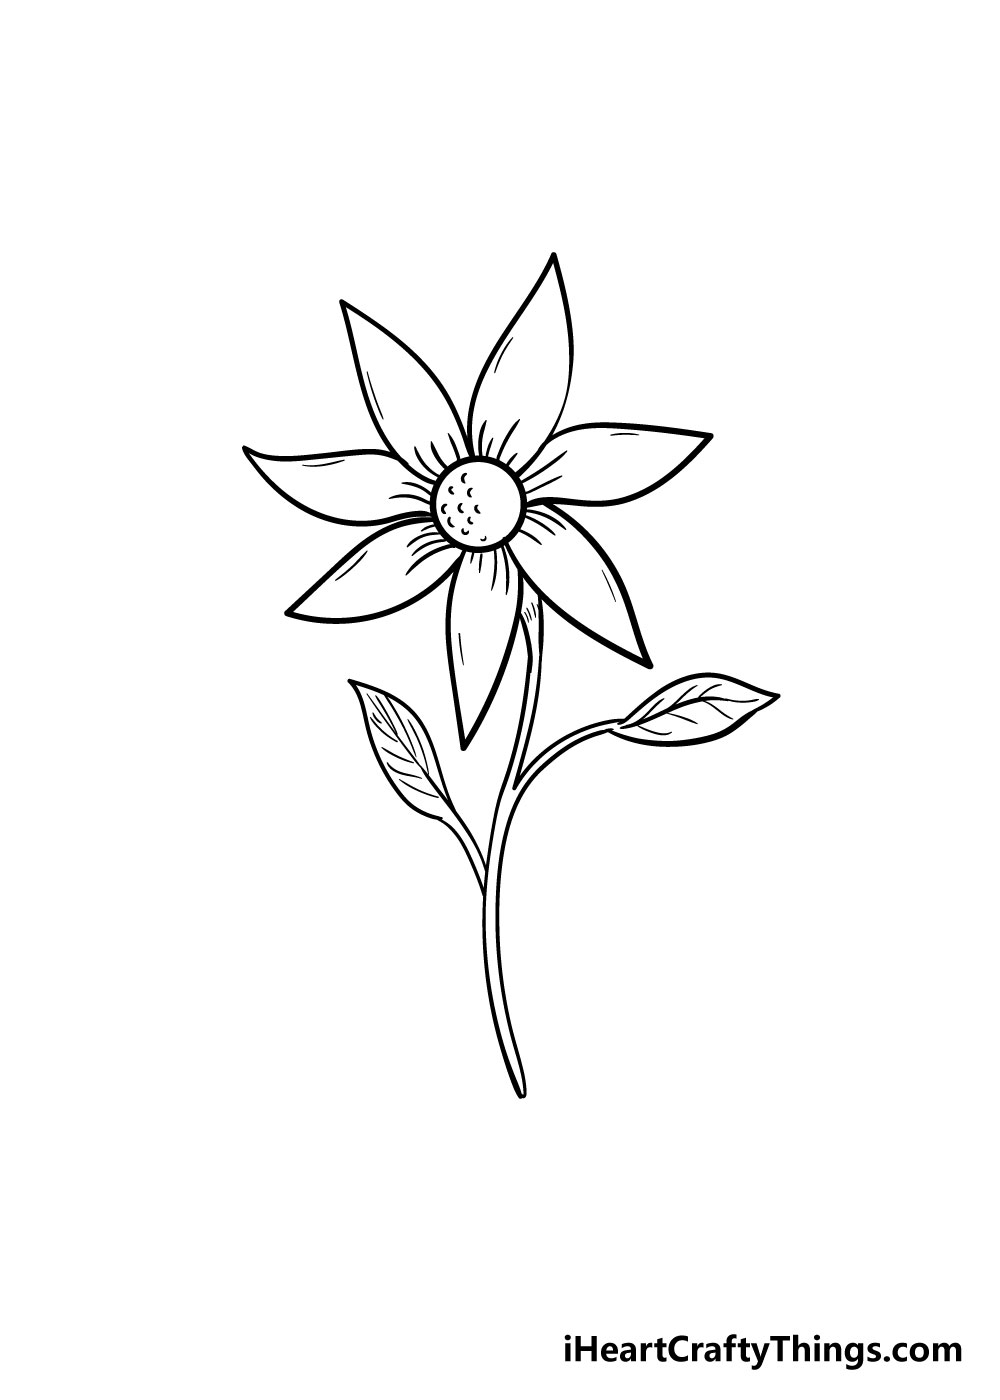
Your flower drawing is almost complete! For this step, we will be adding in some details to your flower drawing.
To start with, you can draw in the veins of the leaves using some thin lines. You can refer to the reference image to get an idea of how these veins should look!
You can then add in some lines in the petals extending from the center of the flower to make the petals look wavier.
Lastly, you can add in some small curved lines to the center of the flower to give it a more textured look. There are more small lines you can add as well for some extra little details.
Step 9 – Finish it off with some color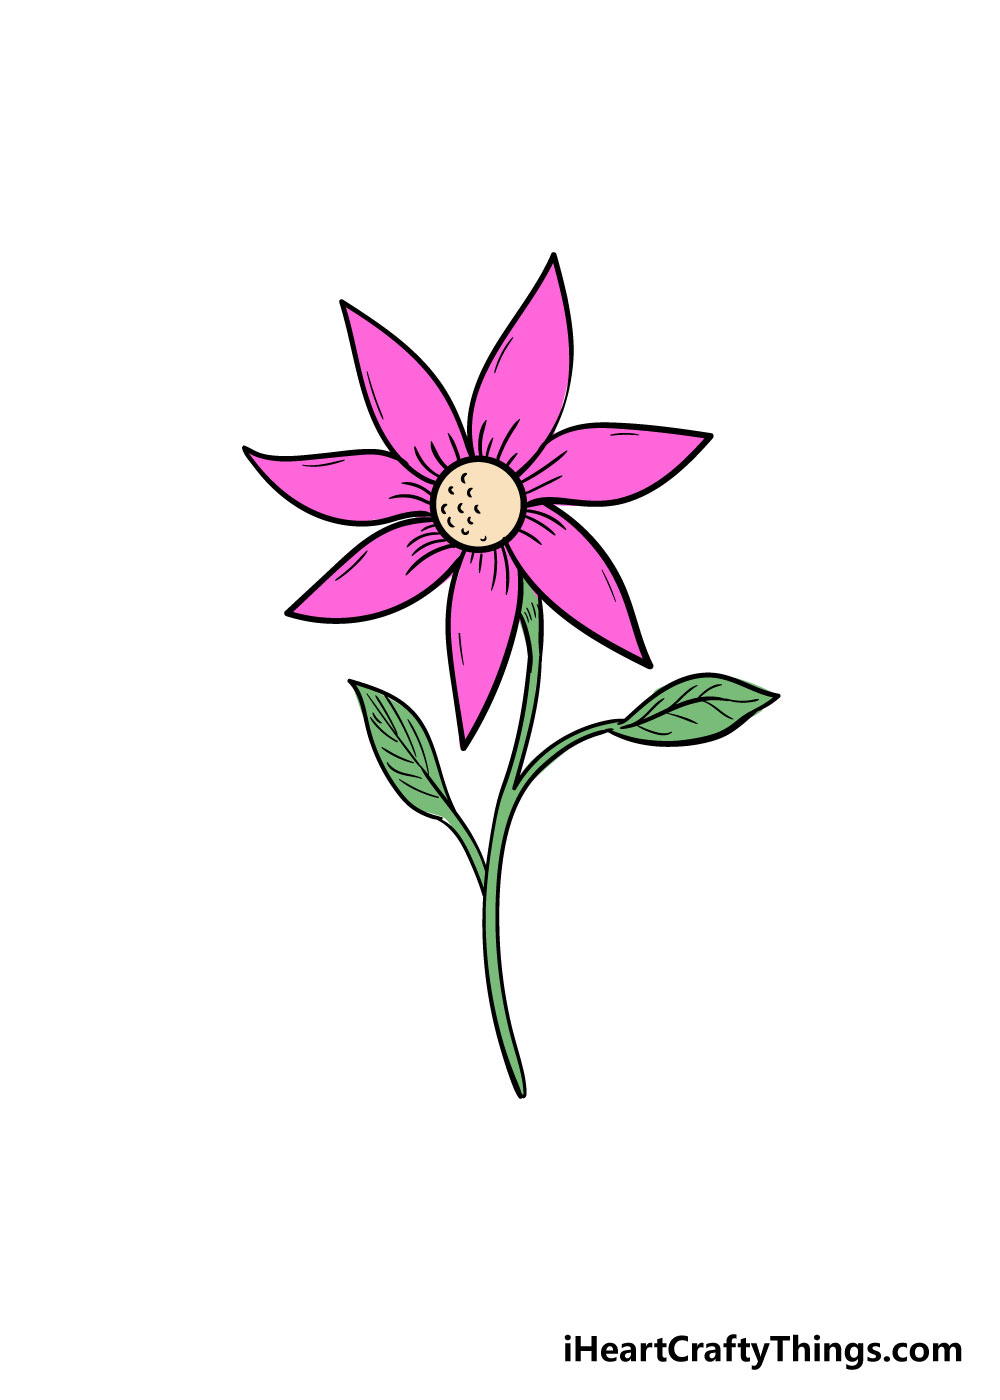
Now that you've completed your beautiful flower drawing, there's just one thing it needs: some beautiful colors!
This is a step where you should let your imagination and creativity run wild.
We have an example of how you could color it in, but you should use whatever colors you love to really bring your flower drawing to life!
You could also experiment with different art mediums such as paints, watercolors, colored pens and pencils for different stunning color looks.
4 More Ways To Make Your Flower Drawing Unique
Create some beautiful floral arrangements with these 4 helpful art tips!
We created such a pretty flower sketch together during this guide, but it is just one of many different flower species you could depict.
If you wanted to make this into a real bouquet, you could draw some other flower species surrounding it.
You could draw some roses, daisies and maybe some tulips as a few examples of flowers you could add to the scene.
These are just a few examples, but you could go for any number of favorite flower species instead if you prefer. What are some other flowers that you could add to the image?
This flower drawing is looking really pretty already, but you can make it look even prettier with some small details and additions.
For example, some bees could be buzzing around the petals or there could be a caterpillar crawling on the stem.
These are a few little creatures you could expect to see around a flower, but you could also add a cute little mouse or many a badger if you want some bigger animals!
Flowers will often grow in a luscious field or a lively forest, and you can add a background setting to show where this flower could be growing.
We gave you two examples of a setting, but you can probably think of many more that you could use.
You can go for realistic settings, but you could also go for a more stylistic setting of patterns and shapes instead. Which approach will you go for?
Flowers are known for their amazing colors, and that means you have a wide color palette that you can use for this drawing of a flower.
Choosing the colors is just a part of the fun, as you can also play around with different art tools and mediums.
We always think that watercolor paints are a good option for petals and other details like this, but more striking mediums can also be just as beautiful. What will you use for this image?
Your Flower Drawing is Complete!
We hope that you had a great time using our step-by-step guide to learn how to draw a flower!
As with any drawing project, it can be challenging to get right but is always made much easier when you break it down into steps.
We're sure that using this guide you will master it in no time!
Once you've gotten the hang of it, you could experiment with drawing different flowers using this guide as a starting point. If you do this, it could really help to use photos of your favorite flowers to help you.
We also can't wait to see what beautiful colors you use for your flower drawing! Once you've completed your artwork, we hope that you will share it to our Facebook and Pinterest pages for us to enjoy!
We always love your brilliant artworks and we can't wait to see some colorful and stunning flower drawings from you!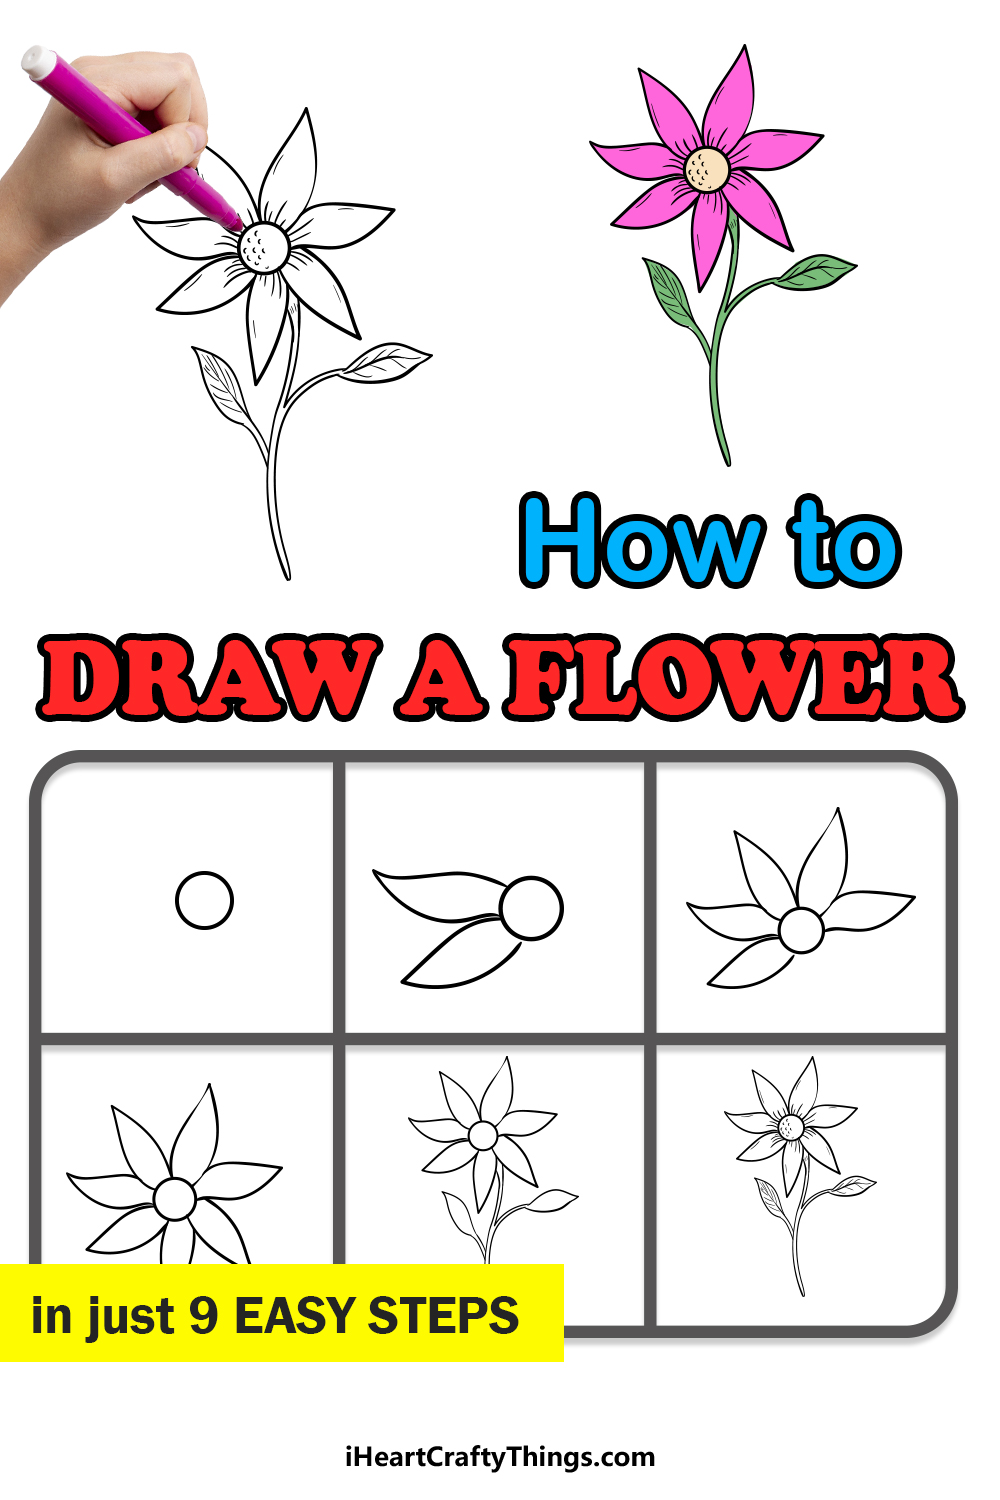
Source: https://iheartcraftythings.com/flower-drawing.html
0 Response to "Easy to Draw Flowers Step by Step"
Post a Comment